Setting up OpenHAB development environment on Ubuntu
 This post describes how I set up my development environment for OpenHAB on Ubuntu 14.04 LTS.
I followed the tutorial How to set up a development environment for openHAB.
Ensure the system is up-to-date
sudo apt-get update
sudo apt-get upgrade
Git clone
su -
cd
git clone https://github.com/openhab/openhab
cd openhab
ls
Download and install oracle jdk 1.7
I followed the tutorial How To Install Java on Ubuntu with Apt-Get.
Check current Java version
java -version
Install Jave Runtime Environment
sudo apt-get install default-jre
Install Java Development Kit (oracle jdk 1.7.80)
sudo apt-get install default-jre
Set environment variable
nano /etc/environment
Add JAVA_HOME=”/usr/lib/jvm/java-7-oracle”.
Update environment variables from file
source /etc/environment
Check environment variable
echo $JAVA_HOME
/usr/lib/jvm/java-7-oracle
Re-check JDK install
sudo update-alternatives --config java
Download and install the Yoxos Installer
tar -xzvf Yoxos_Launcher-5.6.1b-linux-gtk.x86.tar.gz
cd yoxos
./yoxos
Then hit the Launch button to install updates.

Download and execute the file openHAB.yoxos
./yoxos openHAB.yoxos
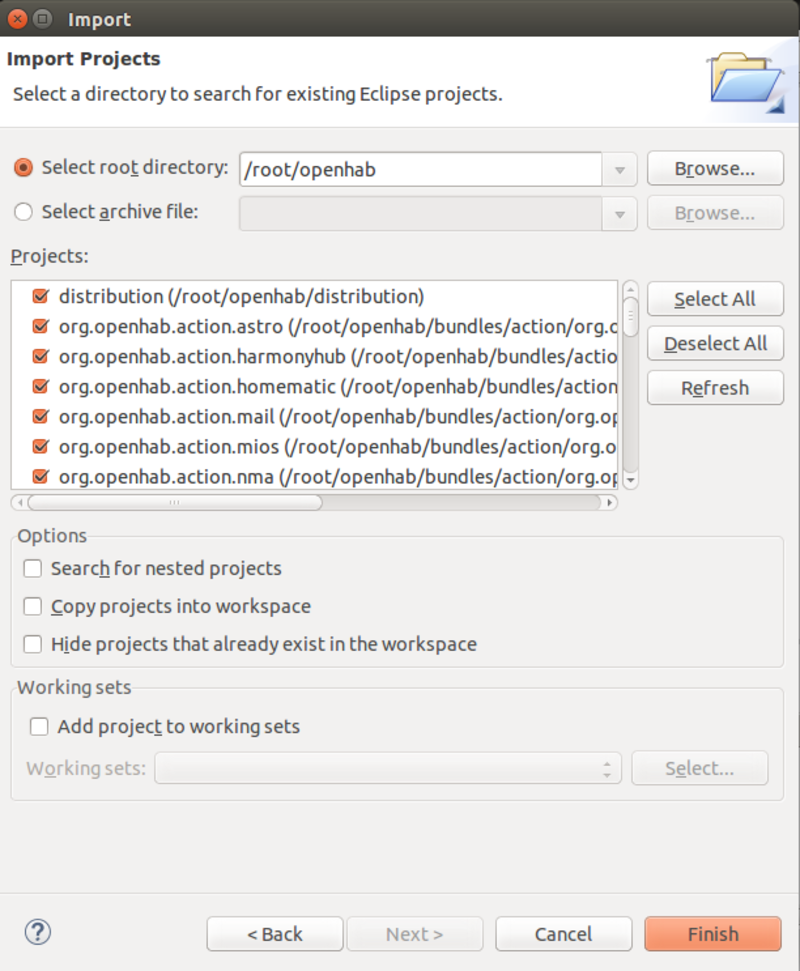
Import OpenHAB GitHub clone
Choose File, Import, General, Existing Projects into Workspace, enter your clone repository directory as the root directory and press Finish.
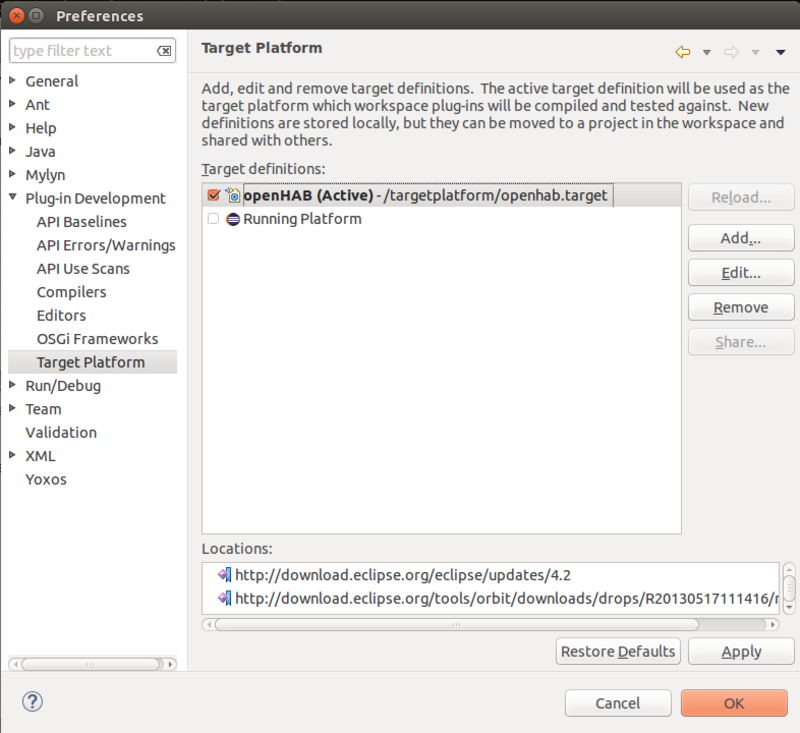
Select the target platform
by selecting Window, Preferences, Plug-in Development, Target Platform, openHAB from the main menu.
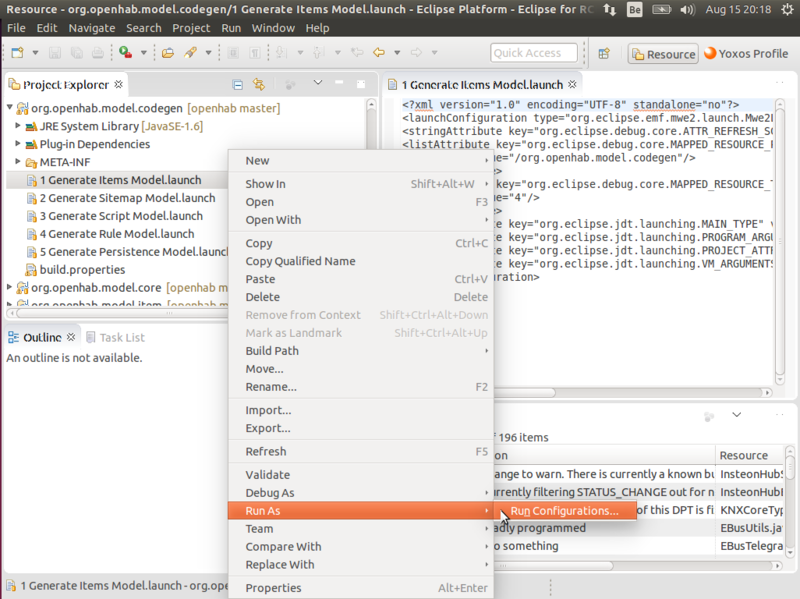
Run code generation
Go to the project org.openhab.model.codegen and run the prepared launch files. For each .launch file, select Run As, x Generate abc Model from the context menu. Please follow the order given by the numbers.
This is where I hit a snag…
In my Eclipse screen the option Run As, x Generate abc Model is not available from the context menu. Checked this thread. Closed and re-started Yoxos. Performed target reload (Window, Preferences…, Plug-in Development, Target Platform, click Reload button).
So this is where I am stuck right now. Better ask for help on the openHAB support forums.
Sidetrack -> attempt to get the code compiled anyhow
Install Maven
apt-get install maven
Create Environment Variable MAVEN_OPTS and set it to -Xms512m -Xmx1024m -XX:PermSize=256m -XX:MaxPermSize=512m in order to avoid memory problems during the build process.
nano /etc/environment
Add MAVEN_OPTS=”-Xms512m -Xmx1024m -XX:PermSize=256m -XX:MaxPermSize=512m”
Update environment variables from file
source /etc/environment
Check environment variable
echo $MAVEN_OPTS
Test build
On the topmost directory level of the openHAB repository, run:
mvn clean install
Build fails.
Next steps
Next steps: (halted due to above snag):
On the very first code generation, you are asked in the console to download an ANTLR file, answer with “y” and press enter on the console. (See https://groups.google.com/forum/#!topic/openhab/QgABTJAkHOg if you’re getting “Could not find or load main class org.eclipse.emf.mwe2.launch.runtime.Mwe2Launcher”). If step (3) fails with a CompliationException go Window -> Preferences -> Java -> Compiler and make sure JDK Compliance level is at least 1.6. All your project in the workspace should now correctly compile without errors. If you still see errors, mark all projects and issue a project refresh (not by F5 but using the context menu refresh). If you still see error markers, try a “clean” on the concerned projects. If there are still errors, it could be that you use JDK 1.6 instead of JDK 1.7, or the JDK compliance is set to 1.4 or 1.5 instead of at least 1.6. To launch openHAB from within your IDE, go to Run->Run Configurations->Eclipse Application->openHAB Runtime (resp. openHAB Designer). Switch to “Plug-in Development” perspective first (Windows->Open Perspective->Other->Plug-in Development).